If you sell private-label products on Amazon, you’ll want to make sure your listings are working hard to do the selling for you. And that means you’ll need to optimize them.
Optimized listings have two roles:
- To boost the visibility of the listings in the search results.
- To increase conversions.
But how should you go about optimizing your listings effectively?
In this guide, we cover the main steps you need to follow to optimize your Amazon listings to maximize sales and grow your business.
TL;DR
- Optimize your Amazon listings to both boost their visibility in search and increase conversions.
- There are several factors to consider for effective listing optimization.
- From detailed keyword research to the effective use of images, every factor can make a big difference.
- Don’t forget to A/B split test your listings to optimize them further.
Optimization Factors to Boost the Visibility of Your Listings
When it comes to increasing the visibility of your listings, there’s one major component: Keywords.
Amazon encourages you to use as many relevant keywords as you can in your listing to help get it to rank higher in the search results.
Search engine optimization always involves keyword research, and the same is true on Amazon. While Amazon SEO is different to search engines like Google because it’s focused on products alone, keywords still play a role.
Amazon uses its A10 algorithm to determine which listings show up where. As such, an optimized listing can get in front of more potential customers.
Keywords are not the only factor, so don’t expect to optimize your listings for keywords and suddenly see them appear in the top spot. But it’s an essential part of the equation.
To optimize your listings for the search results, you need to:
- Find the best keywords to use.
- Incorporate those keywords in the right places.
Let’s take a closer look at both of these areas.
1. Carry Out Keyword Research
There are several excellent tools you can use to find out which keywords you should be using in your listings. They’re affordable, and they will save you hours of time.
That being said, start off by brainstorming.
Think about the types of keywords people would type into the Amazon search bar if they wanted to find the product you were selling. Start with the obvious and work your way down to the less obvious.
It’s not going to be particularly accurate, and there are many words people will use to search for your product that you won’t guess.
But it’s a good starting point, and it gets you thinking like a customer, which will help you throughout the optimization process.
As part of your brainstorming, look at other products that are similar to yours. Check out the top 10 or 20 results—the fact that these products are ranking highly suggests they’re going about their keyword optimization properly.
Take an especially close look at the product titles. These are typically where the most important keywords are used, as we’ll discuss later.
But don’t spend too long on this because you’ll get better results by using a dedicated keyword research tool like MerchantWords.
Most of the keyword research tools are available on monthly subscriptions. But if you’re regularly launching new products or optimizing listings, this will be money well spent.
Start by typing in the primary keyword and generate a list of results. You may find dozens or hundreds of keywords all ranked by factors like search volume and relevancy.
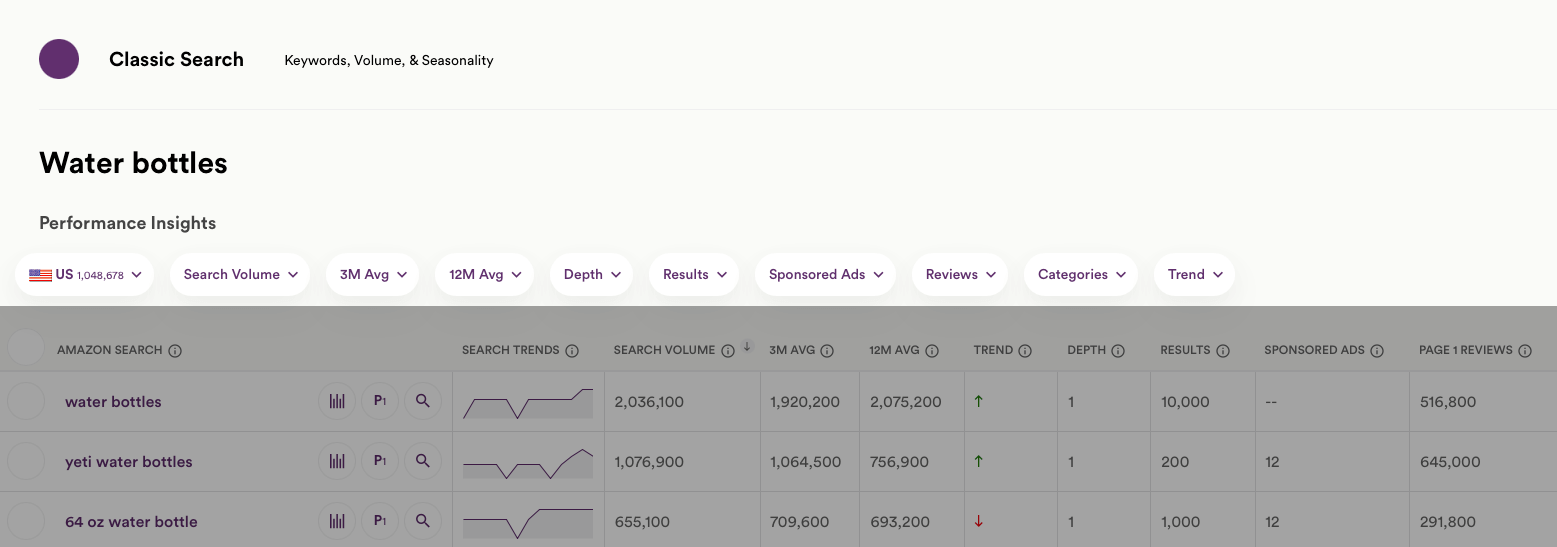
You can then gather them all together and create a list of keywords ranked from the most to the least important.
2. Use the Best Keywords in the Right Places
Now you’ve got your keyword list, it’s time to put them to use. This is the second stage of optimizing your listings for visibility.
One thing you need to know about Amazon optimization is that you only need to use each word once. After a single word has been used anywhere in the listing, Amazon will factor it into its algorithm.
This is useful because you don’t need to keep repeating short or long-tail keywords, which would make your copy sound unnatural.
There are a few areas to focus on when it comes to incorporating the keywords in the right places.
Product Title

As mentioned already, the title is the most important place to use your keywords because they have the most weight here. As such, use your best keywords here.
Use as many as you can in the length permitted, which is usually 200 characters. But make sure the title is readable and informative rather than just a list of keywords.
Don’t worry about trying to tempt people to click your listing by using tricks of subjective copy like “Best” or “Amazing.” Doing this can actually have the opposite effect because it’s against Amazon’s guidelines.
Keep it clear, focus on important features, state who it’s for, the size and quantity, and more, all while incorporating your main keywords.
Key Product Features
The key product features, or bullet points, are next on the list. If you have any main keywords that you didn’t manage to fit into the title, try and fit them into this section.
This shouldn’t be too much of a challenge because there’s a lot more space in the key features. You usually have 1,000 characters in total split between five bullet points.
Bear in mind that many shoppers will not go on to read the whole product description. They may only read the bullets, so make them count.
We’ll provide more info on using compelling copy later. For now, just make sure you use your main keywords while keeping the bullet points clear, concise, and with a focus on the most important features and benefits.
Product Description
Next, move on to the product description. This is usually up to 2,000 characters, so there’s plenty of space here to get your keywords in.
Keywords are less important in product descriptions, but try to fit in any remaining keywords if you can do so naturally.
The main focus should be on providing accurate information and creating persuasive copy.
Backend Search Terms
Finally, make full use of the Backend Search Terms, often called backend keywords. Shoppers will not see these, but they have an impact on the search results.
Use this section to enter any keywords that you didn’t manage to get into the title, bullets, and description.
It’s better to use them here than to stuff them in somewhere they don’t fit, and this is why this option is here.
You have up to 250 bytes of space, but make sure you don’t go over this or none will be counted.
Don’t waste space by adding in keywords you have already used somewhere else. It’s a good place to add synonyms, and you should separate each word with a space.
Optimization Factors to Boost Conversions
Keyword research and correct use of keywords are the two factors that affect visibility in search, when it comes to product listing optimization at least.
But what about increasing conversions?
This isn’t so much about the keywords. Instead, it’s about connecting with shoppers on a human level to encourage them to choose your product instead of choosing a competitor.
There are six major factors to consider here, so let’s take a look.
1. Create Persuasive Copy
One of the most important things you should do when creating your listing is to use persuasive copy. This can be a challenge on the product detail page.
Firstly, you want to make use of the keywords; secondly, Amazon has rules about what you can say in certain parts of the copy.
For example, you should not use subjective language and mention things like “Sale” or “Best.” Instead, the copy should be informative.
But while you should provide all the essential information customers need to make their decision, you should make an effort to make the copy sound appealing.
Rather than just listing off the main features, incorporate copywriting techniques:
- Suggest ways that customers can improve their lives by using your product.
- Make the product sound appealing.
- Give it an engaging and trustworthy tone.
- Speak to them directly.
- Empathize with their hopes and fears.
- Let them know how your product will solve a problem.

A good place to start is by reading other listings that rank highly—not only for similar products but other products too.
Which of them sounds the best? Which of them makes you want to reach for your wallet?
Make sure your content is accurate and avoid grammatical and spelling mistakes. An accurate product description is more likely to encourage trust in you as a seller.
It’s also an easy way to stand out from the other products, many of which will contain errors in the copy.
Consider using A+ Content so it stands out even more. This allows you to use more images and copy so you can present the information in a compelling format. You can only use this if you’re enrolled in Brand Registry.
2. Use Professional Product Images
The copy is important, but so are the images you use in your listing. In fact, they can often be more important.
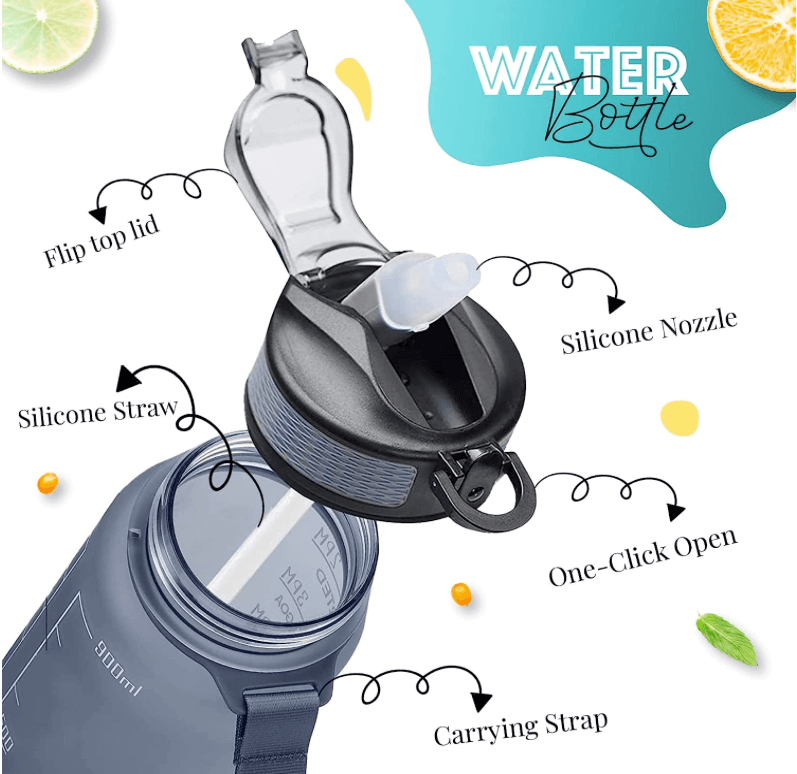
Many shoppers will start by looking at the images and taking a closer look at your product from different angles as well as zooming in on the details. If they like what they see, they might then read the copy for more information.
Make sure you optimize your images by focusing on several key areas.
Start by taking professional photos of your product. Don’t assume that a few smartphone photos will cut it. This may be enough when selling used products on eBay, but not on Amazon.
Invest in professional photography. Yes, this involves a cost, but shoppers will expect professional images and they’re less likely to trust you if you cannot make the effort to take pro photos.
Blurry photos and badly lit photos don’t look great. They make your product stand out in the wrong way, and this can have an impact on your conversions.
Remember, while you’ll have to pay for professional photos, you only have to take them once. After your listing is live, they will continue working for you for many months and years. And the difference they make in sales can be enormous over that time.
Always use all the images you’re allowed to. You can always find a new angle to take a photo from. Remember, shoppers want to see the product from as many angles as possible.
Show photos that make the size of your product clear. Picture it next to something like a hand so people can get a feel for how large it is.
Take at least one lifestyle image showing your product being used. This helps to create a picture for your customer of how it will have a positive impact on their life.
While these are all effective ways to optimize your images, always stick to the guidelines. Amazon has strict requirements, so follow these.
Images should also be clear with no blurry areas or pixelated areas. They should represent the product accurately, and the product should fill at least 85% of the image.
You should also make sure they’re large enough. That means at least 500 pixels high and 1,000 pixels wide. For the best results, the longer side should be 1,600 pixels if you want optimal zoom to work. This allows shoppers to zoom into the image and see the details.
Related: How To Structure Your Amazon Image Gallery For Maximum Conversion
3. Answer Questions in Detail
The “Questions & Answers” section is another area to optimize your listing for conversions.
Shoppers will often ask questions on Amazon to find out more about your product, so make an effort to answer these.
Be quick so customers don’t have to wait around to get an answer, by which time they may have bought a different product.
Be professional. Even if it’s the tenth time someone has asked the same question, don’t be rude. Politely answer it for them and provide the details they’re looking for.
If people find the information they need quickly, this could make the decision for them. Also, if you come across as a helpful, professional seller, they’re more likely to trust you.
If you answer questions with one-word answers, or you come across as annoyed that you have to answer questions, it could have the opposite effect.
Use the questions to your advantage. If people keep asking the same question, you should make this information clearer in the product description.
Some people may not find the information they need but move on to another product instead of asking a question. By making the information clearer, you might convert more of these shoppers.
Use them to get a better understanding of your customers. What matters to them? What are the main fears they need to overcome before purchasing your product? Use this information to optimize your copy.
Having more questions could even help to improve your rankings in the search results.
4. Get Lots of Positive Reviews
Reviews could come under both categories: they can help boost the visibility of your listings as well as increase conversions.
The more positive reviews you have, the better. Remember, shoppers do not know anything about you and they may have doubts about your product.
Product reviews are a form of social proof that give shoppers more confidence. It’s far more effective to hear from other customers about how great your product is rather than hearing it from the seller.
Reviews play a role in the search algorithm, so having lots of positive reviews could increase the visibility of your product, which is very important.
But good reviews can also help convert shoppers into buyers. If someone lands on your product listing and finds that hundreds of customers have left positive reviews, this could swing their decision.
So focus on building reviews. This is a long-term process, and it can be slow going at first. Over time, you’ll naturally start to generate reviews as more people buy your product.
You can also encourage buyers to leave reviews by sending a manual reminder. This can be an effective way to get more reviews. Some people will not leave a review until prompted because they forget, and a gentle reminder can be useful.
Doing this for every sale can be time-consuming. But third-party review software can make it easier by automating the process. This software, like FeedbackExpress, will often send you notifications about positive and negative reviews, so you can keep on top of your reviews.
There’s one more thing to keep in mind with reviews: Use the information your customers provide.
If several customers leave negative comments because they were unaware of a feature of your product, like it was larger than they thought, clarify this information in your product description.
Related: How to Get More Reviews on Amazon in 2023
5. Have a Good Repricing Strategy
Repricing is something that many Amazon sellers do to make their products more competitive. This is especially true when they’re selling the same product as other sellers and they want to win the Buy Box.
If you’re selling a private-label product, you won’t be as concerned about winning the Buy Box. But you’ll want your product to be more competitive, especially if several other sellers have their own versions of your product.
While repricing isn’t strictly a listing optimization tactic, it should be mentioned here because the price is always going to have an impact on conversions. If your product is very similar to another seller’s product but you charge more, there’s a chance shoppers will choose to buy the cheaper version.
This is where using an automated repricing tool like Repricer can help.
You can set it up with your own rules about the minimum and maximum prices you want to charge. It can then keep a close eye on competing products, and if a seller drops the price, it can drop the price of your own product so your competitor doesn’t soak up all the sales.
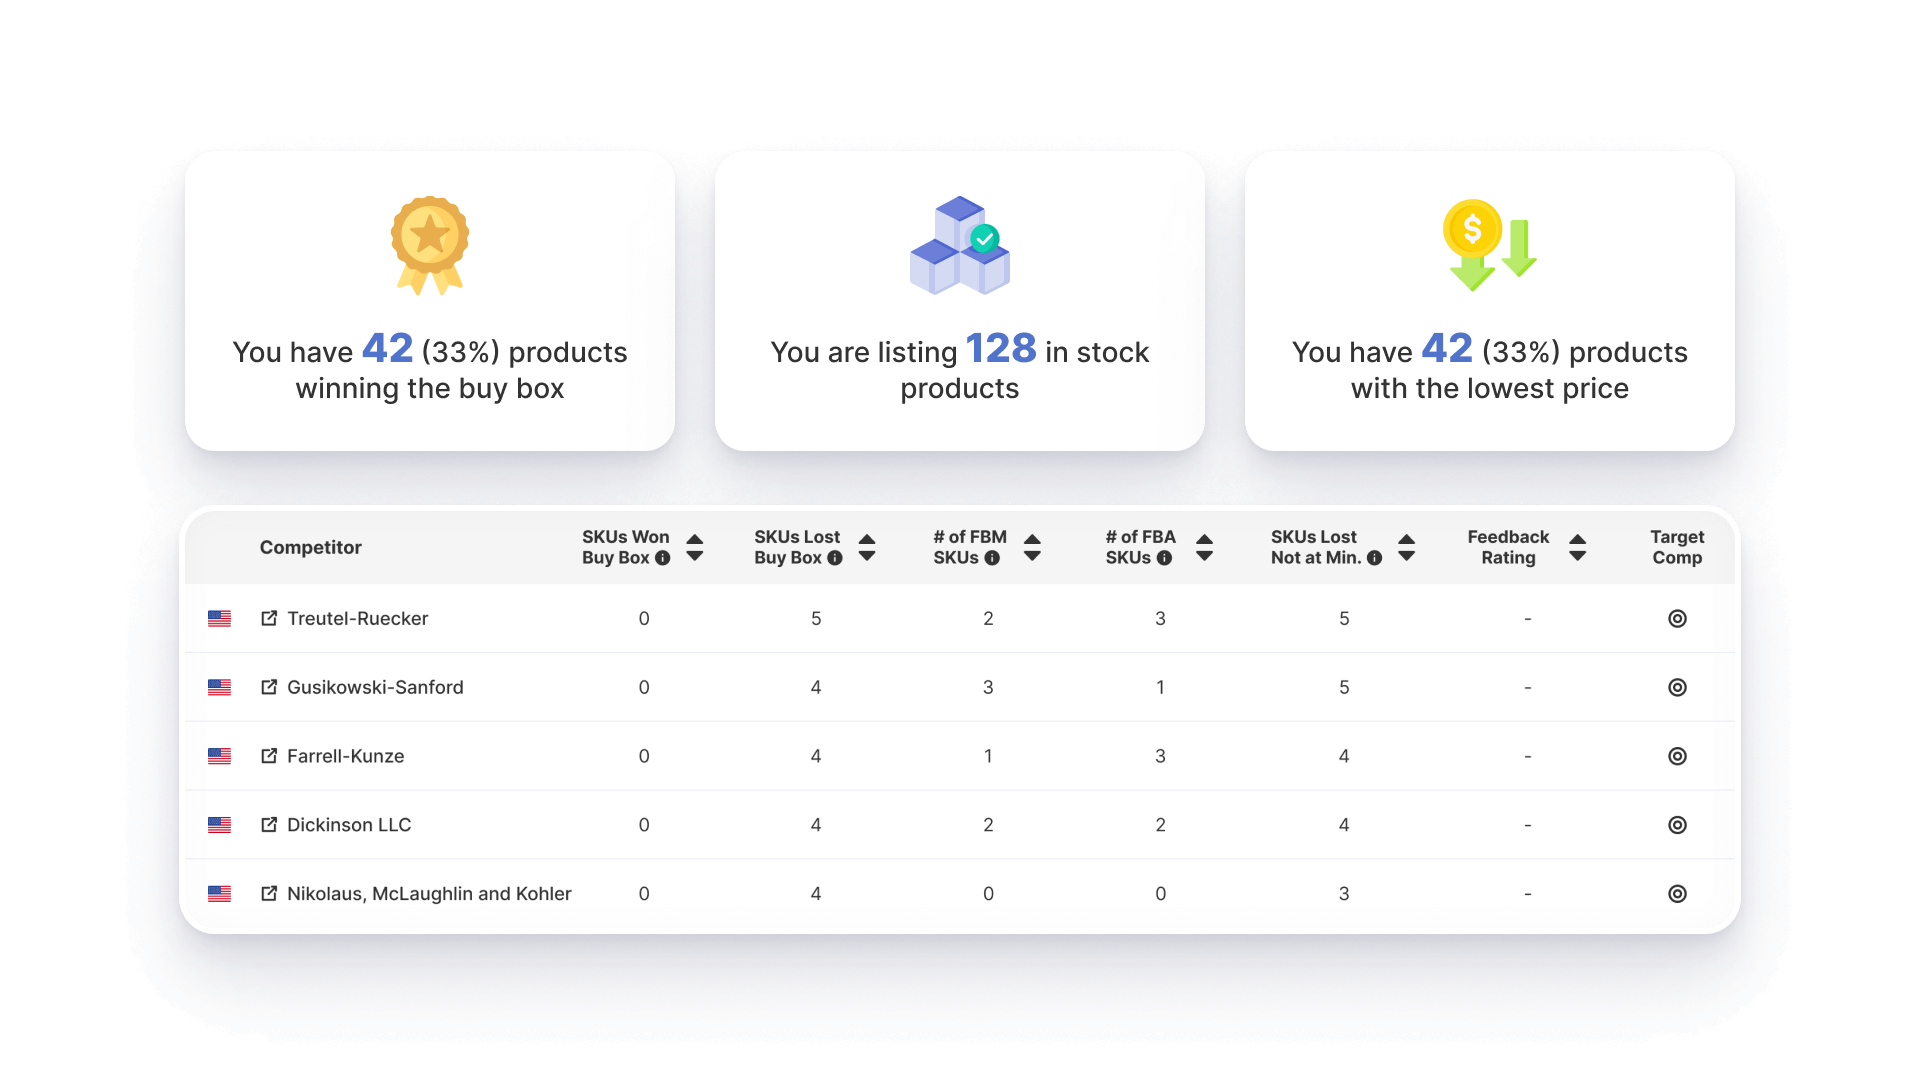
This could have a big impact on how many sales you make, and it’s all automated so you don’t have to keep changing the price of your product manually.
Related: Types of Repricing Methods Amazon Sellers Can Use to Improve Their Price Management Strategy
6. A/B Split Test Amazon Listings
While all of the above factors can have an impact on conversions, don’t forget that you should measure the effectiveness of each of them. You can do this by A/B testing your product listings.
You may follow all the best practices for writing a good product title or creating a good product image. But at the end of the day, you’ll only know whether it’s effective by testing it.
By using an A/B testing tool, you can test different versions of your product listing by changing one feature. This may be the title, an image, or something else.
Different customers will see different versions, and you may find that one of these versions leads to more sales, suggesting the feature you’re testing is more effective. You can then use this feature in all of your listings.
Amazon’s Manage Your Experiments tool in Seller Central is the easiest way to get started. It’s free to use, and you can use it to carry out lots of test variations and optimize your listing over time.
Optimize Your Amazon Listings
Amazon listing optimization is a big topic. But as you can see, there are a few crucial areas you should focus on both to increase the visibility of your listings in the Amazon search results and increase conversions.
Taking a few simple steps can have a big impact on your overall sales. Even something as simple as writing better bullet points or having a better product description can have a positive impact.
So follow the steps outlined in this guide. Start by carrying out detailed keyword research, incorporate those keywords into your listing, and create compelling copy and images.
Get your repricing strategy right, and keep on testing your listing to find the best possible version. This is an ongoing process, but the results will make it worth your while.
Unlock the potential to boost your sales and drive higher profits. Start your 14-day free trial now.
